How to Install a Stone Tile Shower Surround

Install a Stone Tile Shower Surround - Tuscany Warmth
How to Install a Stone Tile Shower Surround - Plan First
Maybe you are converting an old bathtub or maybe you are creating a new bathroom, either way before you concern yourself with How to Install a Stone Tile Shower Surround, you should spend some effort in planning how your stone tile shower surround will look. A little time spent now will pay off huge later. Since a bathroom renovation entails a fair bit of work, you will want to make sure you know all the steps before you start.
Now is the time to look through home magazines and tile showrooms. First find the bathroom look that appeals to your senses. Natural Stone tiles make for a very warm and inviting experience. Decide whether you want Tuscany warmth, Marble elegance or Slate cool, or many other design styles.
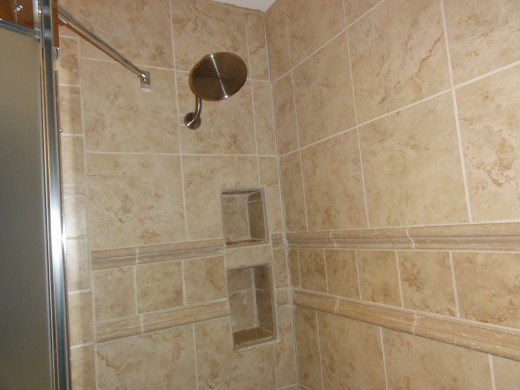
For my bathroom, I had an old tub-shower with ceramic tile. I decided to go with a Tuscany look. My inspiration came from visiting a local home improvement store where they had a Tuscany Stone Tile Shower Surround display. Now that I knew what my bathroom was going to look like, I had to learn what products I needed in order to create this magnificent space. This included a shower basin kit, various Tuscany stone tiles, corner trims, mortar, grout and of course glass doors.
How to Install a Stone Tile Shower Surround - Time to Purchase the Stone Tiles
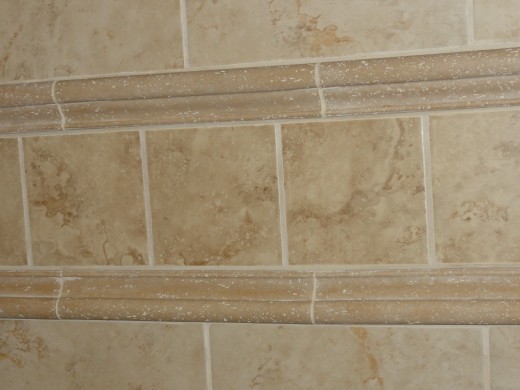
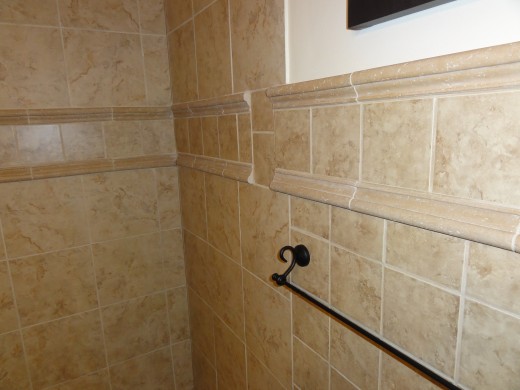
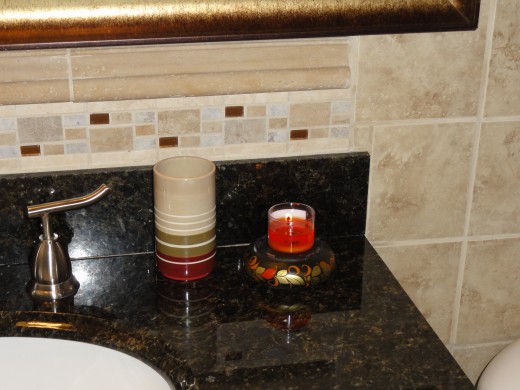
Once you have decided on the look and before you think about how to install a stone tile shower surround, you will have the task of purchasing the products required to build your dream stone tile shower surround. Of course you will need the stone tiles, perhaps several different sizes and shapes, even styles. I ended up buying 1'x1' stone tiles and trims, and also 6"x6" ceramic tiles to achieve the look I was after. The ceramic tiles happened to look exactly like the larger tiles, just smaller. It's okay to mix and match tiles, the key is to use whatever will achieve that special look you desire. I also found small stone borders with various inlays. A perfect accent to my stone tile walls.
To install your stone tile shower surround, you will need to purchase cement board for the shower surround area, mortar, grout, various tile installation tools including mortar trowel, tile cutter (for ceramic tiles), wet saw (for stone tiles), corner trims, glass doors (again many styles to choose from) and most importantly a shower floor and drain kit. I say most importantly, as the shower floor and drain kit is crucial in having your beautiful stone surround drain properly with no leaks.
I highly recommend the Schluter Shower kits, they include various shower floor sizes, drain system, shower curb, and complete rubber membrane kit to waterproof your shower. They have full instructions on how to completely install the kit DYI style. The most impressive part is the Schluter Shower kit allows you to install a shower drain without having access from below the floor. You will find this really helpful if you have a finished ceiling below the shower floor like I did. There is no need to cut a hole in the ceiling below to assemble the drain.
You may need to visit several different stores to get everything you need. I ended up making purchases from at least three different stores. This was mostly a result of my desire to want different styles of stones and trims, no one store had everything I wanted. For you it may be different, one store may have everything you need to install your own stone tile shower surround.
Stone Tile Shower Surround - Basin and Drain
Shower and Bath Products on Amazon

How to Install a Stone Tile Shower Surround - Prepare The Area
Once you have decided on how you want your stone shower surround to look and you have purchased your supplies, it's time to prepare the area. In my case, I had an old tub to remove and of course all the old ceramic tile. First, I highly recommend removing the toilet and any other items that might get in the way.The tub was fitted into the width of the bathroom from stud to stud. To remove the tub, I had to first remove the tile and the drywall behind. Once the tile and drywall were removed and I had disconnected the tub faucet and drain system, I was able to maneuver the tub up and out of the bathroom. With the bathroom stripped, now is the time to start the install of your stone tile shower surround.
All showers should have cement board installed as a base for the tile. This helps to prevent mould spores from taking hold in the walls. Before installing the cement board, this is the time to install your new shower faucet hardware. For many, soldering in new shower faucet hardware is best left for a professional, someone with experience. You don't want any leaks after your new shower system is installed. After your faucet hardware has been installed and tested leak free, the next step is to install cement board from floor to ceiling on all walls surrounding the shower. The cement board is easily cut to the desired shape using a handsaw. Fasten the cement board to the wall studs using backer board screws, every six inches.
Prepare enough mortar to fill in all the seams. Then cover all seams with fiber tape and fill in with the mortar using a drywall putty knife. Now you need to prepare the shower floor area. Make sure the floor area is perfectly level. The floor needs to be completely level to ensure proper drainage. If you find it isn't level, purchase some floor leveling compound and apply as directed to the area as needed.
Once the floor is level, you will need to use the Schluter Shower Basin kit to measure and determine the exact location of the drain. Do not assume it will be the same as the tub drain. You will likely also have to remove part of the existing PVC drain system the tub was using and install new piping to align up with the new drain location, and don't forget to install the trap. Make sure you cement all PVC joints with PVC cement once you have confirmed the fit and alignment. This can all be done from on top of the floor. I my case I had to cut away a bit of the floor plywood so I could access the PVC piping and make the necessary adjustments for the new drain location.
Stone Tile Curb
How to Create Your Own Waterfall Meditation Pond
- How to Build a Waterfall Meditation Pond
Create your own waterfall meditation pond. Relax to the soothing sound of water cascading over rocks. You can build your very own private zen garden, a place to escape.
Schluter Shower Kit - How to Video
How to Install the Stone Shower Surround Basin and Curb
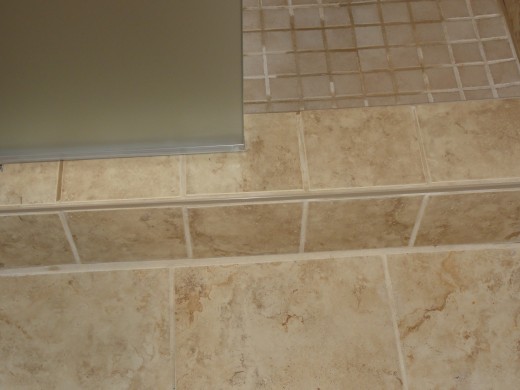
To complete the preparation for the stone shower surround, you now have to install the floor basin and curb assembly. These come with the Schluter Shower Basin Kit and can easily be cut to fit the desired base length and width. The basin and curb are formed out of a special styrofoam. The basin itself is formed with all surfaces slopped inwards towards the drain hole. Measure the shower area and then cut the basin to fit snugly making sure the drain hole is centered over the drain.
Once you have confirmed the styrofoam basin fits snugly and centered over the drain hole, you mix another batch of mortar. Remove the styrofoam basin and apply an even coat of mortar to the sub floor using the mortar trowel and scrape with the teeth edge, remove any excess mortar. Lay down the styrofoam basin on top of the mortar and press down firmly and evenly across the entire surface. Now you can cut and measure the styrofoam curb to fit snugly along the edge of the basin. Then apply more mortar to the sub-floor and edge of the basin. Lay the curb into place and press firmly so the curb is snug against the basin.
Now you will need to install the drain system. Easy to follow steps are provided within the kit. You will glue the drain system in place using the PVC cement and the guide provided in the kit. The next step will be covering all shower surfaces with the Schluter rubber membrane. This will ensure your shower is watertight and leak proof.
Mexican Adobe Fireplace - DIY
- Mexican Adobe Fireplace Grotto
If you love Mexican themes, you'll love this Mexican Adobe Fireplace Grotto. Turn your basement into a family room, build your own Mexican Adobe Fireplace.
Waterproof the Stone Shower Surround
The Schluter kit includes a generous portion of rubber membrane, specially designed to make the shower walls and floor water tight. This includes corners, joints and wall sections. To install the rubber membranes, start with all corners first. Mix another batch of mortar, and spread a thin layer over the area to be covered. Press the corner membrane into place using a flat trowel and continue this process until all corners have been covered, including the curb.
Once all corners sections have been completed, the larger wall area can be covered with the rubber membrane. For the walls, the rubber membrane is supplied in a 3' wide roll. Simply measure and cut the desired length. Cover the wall surface with a thin layer of mortar and then press and smooth the rubber membrane into place. The wall coverage should overlap the corners.
Lastly the floor basin area needs to be covered using the same technique. Again, make sure the floor area rubber membrane overlaps the corner seams. The curb also needs to be covered the same way. Once you have covered all surfaces with the rubber membrane you are ready to install the corner trim mouldings.
Measure and cut the trim mouldings to run along all corner edges, including inside the shower surround and along the curb edges. The mouldings can come in plastic or metal. Both can be cut using a hacksaw. Cut the mouldings slowly to achieve an even straight cut and file off any rough edges. Apply a thin coat of mortar to the area along the corner, enough to cover the corner area beyond the moulding. Press the corner mouldings into place and smooth down with a putty knife. Be sure to remove any excess mortar.
More Stone Tile Projects
- How to Install a Slate Stone Floor
Enhance the look of your home with a slate stone tile floor. You can replace your old hallway carpet with slate stone tiles and have a beautiful floor with very low maintenance.
Stone Tile - Variations
Installing the Stone Tile for the Shower Surround
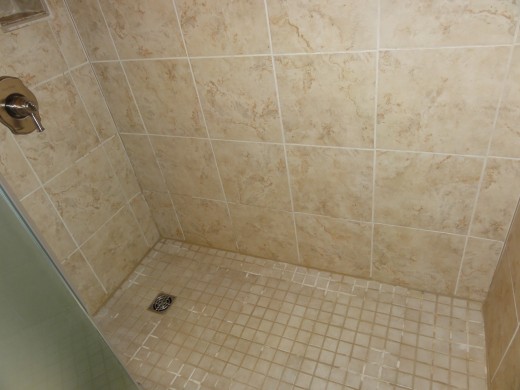
You are now ready to install the stone tiles, whohooo! This is by far the best part, as you can now start to see your vision become a reality. Mix another batch of mortar, install the wall stone tiles first, then the curb and floor tiles last. Measure and cut the tiles as needed. Be sure to use spacers between all tiles and ensure they align properly, use a level to make sure they are running vertically and not crooked. If the first tiles are even just a little crooked, by the time to get to the top of the wall, the uneven look will be glaring, so take care in aligning all tiles properly.
Start from the bottom of the wall. Apply the mortar to a small area at a time, enough for a few stone tiles, scrape the mortar using the tooth edge of the trowel and remove any excess mortar. Press the tile into place and tap lightly with rubber mallet. Continue installing tiles, ensuring the height of the tiles are uniform. Once the walls are complete, continue the same process for the curb and floor areas.
For ceramic tiles, cutting can be performed on the spot using a tile cutter - very inexpensive, for stone tiles you will need a wet saw. A decent wet saw for stone tile can cost between $120 - 160.00, but is well worth it. But they are a bit messy so you will likely want to setup the wet saw in your garage or outside your home.
Once all the tiles are in place, you will need to scrape out any excess hardened mortar from between the tiles. There is a grout remover tool designed specifically for this. First remove all of the plastic spacers, then scrape out the excess mortar. Once the excess mortar is removed, you can now mix the grout. Grout comes in sanded and non-sanded and many color tints. For stone tiles, use a sanded grout. Select a tint color that will complement the color of the stone. Even though I used both ceramic and stone tiles, the sanded grout worked best since the ceramic tiles had the same surface look and feel as the stone tiles.
Mix a batch of grout, then using a grout applicator, spread the grout over a small surface area of the stone tiles. Press the grout into every visible space between the tiles. Wipe off any excess grout. Repeat this process until the entire Stone Tile Shower Surround has been grouted.
Next, fill a pail with lukewarm water and dampen a tile sponge. Wipe off the residue covering the stone tiles. Rinse the sponge often and repeat this process until the residue has been removed from the entire surface of the stone tile shower surround.
Finally, for stone tiles, use a stone and grout sealer to seal in both the stone and grout surfaces.The sealant will also enhance the color of the stone. If you were only using ceramic tiles, a grout sealant would be used instead.
Now all that's left is to install the glass doors. There are so many styles to choose from. In most cases the installation will involve drilling holes in the stone tiles to mount supporting brackets and casings. Use a Masonry bit or you will be drilling forever. You can also purchase little stone drilling kits that include a small water vial. The water seeps onto the drill bit during the drilling process. This allows for even faster drilling. Just be sure to wipe any water off the drill when finished. Once the door is in place, a bead of caulking is used to seal any seams. Your amazing Stone Tile Shower bathroom is now complete.
I really hope this information helps you in creating your own stone shower surround. As in other DIY projects, I would be happy to answer any questions you may have about any of the steps.


