How to Install a Stone Tile Floor With Slate Stone Tile Flooring

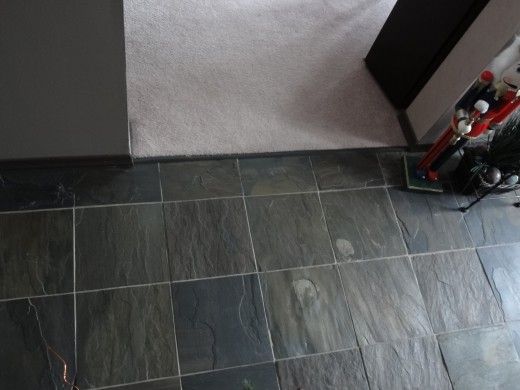
The Beauty of a Slate Stone Floor
How to Install Slate Stone Tile Floor - Making the Right Choice With Slate Stone Tile Flooring
So you decided to go ahead and replace your current floor with real slate stone tile flooring. Congratulations, you have a chosen a look that will enhance the look and value of your home. Before you concern yourself on how to install a slate stone floor you want to make sure you have made the right chose.
My home had wall to wall carpeting on the main floor including the main floor hallway. The front and back entrances were covered in linoleum tile as well as the main floor bathroom. The problem we faced was the traffic from the front and back entrances would constantly drag in outside dirt and the main hallway carpet was impossible to keep clean. We also had no continuity in appearance with the carpet and linoleum tile combination, it just was not very appealing to look at.
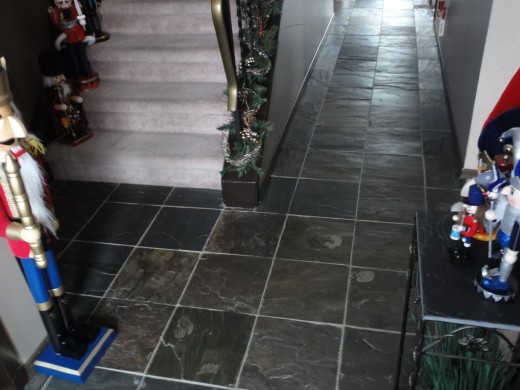
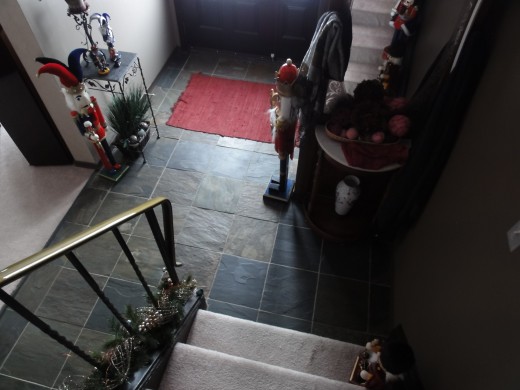
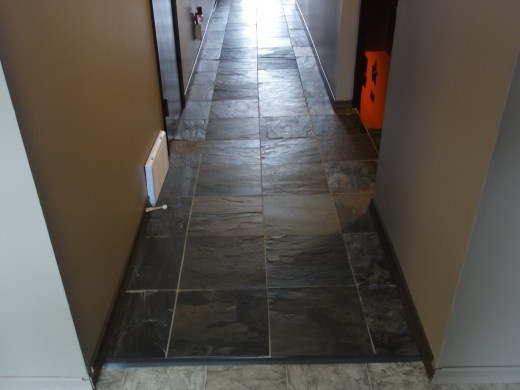
So we decided to go with a natural stone look from the front door down the main hallway all the way to the back door landing area. We also included the main floor bathroom. With the slate stone tile floor we now enjoy a modern look that adds ease of maintenance and value not to mention eye appeal. The floor is also easy to clean no matter how much traffic comes through our home.
The type of stone you choose will depend a lot on what look you prefer. Stone tiles come in many colors and styles. It is best to shop around several home renovation stores and even tile specialty stores and make sure you pick the right stone tiles for the look you desire. Good reputable stores will let you take home full size stone tiles so you can confirm the right look and feel to match your home décor.
Low Maintenance Slate Stone Tiles - Great for Heavy Traffic Areas
How to use a Wet Saw
- How to Cut Stone Tiles and Stone Veneer With a Wet Saw
For DIY projects requiring stone tiles or stone veneer, you will definitely need a Wet Saw. There are a few styles of Wet Saws to choose from. Wet Saws are easy to use and here are some basic guidelines.
Preparing the Floor Surface Before You Install a Slate Stone Floor
Depending on what you currently have covering your floor, you may have to perform various preparation steps. In our case we had to remove wall to wall carpeting. This is probably one of the easiest flooring types to remove. The carpet is held into place along the edges by long thing wood strips laced with sharp nail tips protruding upward.
Simply lift the carpet up and away from the edge and be very careful not to slip your hand underneath or you will feel the wrath of the sharp nail tips. Where the carpet meets a different floor type, you will most likely encounter floor moulding covering the area where the two surfaces meet. Most mouldings for carpet have an overlap area which you need to pry open first using a flat screwdriver. Once the overlap has been lifted, simply pull the carpet off the sharp teeth. Finally you will have to pry the moulding away from the floor. The moulding will most likely be nailed down to the subfloor. Again, be careful when removing the moulding as it too has sharp teeth.
With the old flooring removed you should now have plain view of the bare subfloor. It would be great to just start laying tiles but the truth is the sub floor is more than likely an uneven surface. In older homes this uneveness can be even more visible. Even if the floor looks fairly even, you should take a level and confirm there are no uneven areas that are severe enough to cause issues with laying the tiles down flat. I used a 2 foot level and encountered an area in my hallway where there was definitely a rise on one of the floor joists.
As long as the area is not too uneven, you can use a floor leveler compound. The compound comes premixed and can be applied with a 4 inch putty knife to the floor. you want to fill any areas on the floor to create an even surface or as close to even as possible. For carpet these floor imperfections are not an issue, but for floor tiles they can cause the tiles to crack and also take away from the final appearance. For all your trouble of installing a slate stone tile floor, take the time to prepare the surface properly.
More Stone Tile Products on Amazon
![Ocean Teal Blue Glass Nature Stone Tile Kitchen Backsplash 3D Bath Shower Accent Wall Decor Gray Wave Marble 1 x 2 Subway Art Mosaics TSTNB03 (11 PCS [11.8'' X 11.8''/Each])](https://m.media-amazon.com/images/I/616LPN2soQL._SL160_.jpg)
Time to Install the Floor Board
Once you have the subfloor levelled, the next step is to adhere a floor board over the entire surface. The floor board is a cement board made especially for applications such as installing stone floor tiles. The floor boards come in sizes generally 3 feet x 5 feet or something similar. The board is easy to cut with a utility knife. For the linoleum tiles areas at the front and back entrances, no floor board is required, but the tiles surface should be roughed up with coarse sandpaper prior to tiling.
Before securing the floor board to the subfloor, measure and cut all pieces so that the entire subfloor is covered. You will need to apply a coating of thinset cement to the subfloor using a toothed trowel. The thinset cement is easily mixed in a clean 5 gallon pail. I usually mix only a quarter bag of thinset cement at a time with cold water. This allows me to easily apply the mixture before it hardens.
Remove all of the floor board cut pieces from the floor area and apply just enough thinset cement to cover the subfloor area to fit one piece at a time. Spread the thin set cement and scrape with the tooth edge of the trowel. Then remove any excess cement. Lay down the floor board and secure to the subfloor with floor board screws. Only use floor board type screws as they have a large flat head and a layered thread to hold the floor board in place. Insert one screw every 6 to eight inches covering the whole surface. Real floor board will have spots on one side marking the placement for each screw.
Continue the above steps until all floor board pieces have been secured and the subfloor is completely covered. Allow the floor board to dry for 24 hours. Now you are ready to install the slate stone tiles.
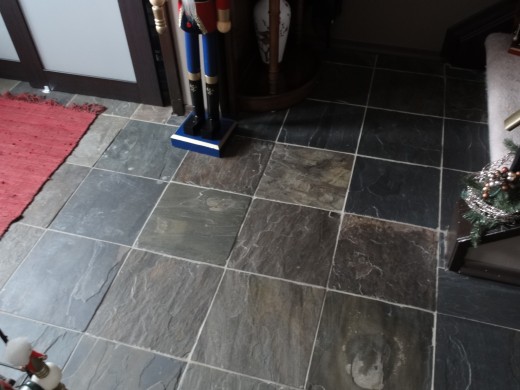
A Balanced Look - Worth the Effort
Border Areas for Stairways and Adjoining Carpet Areas
Installing the Slate Stone Floor
With the floor board in place, you are now ready to install the slate stone floor. Now is the time to plan how you want the tile laid out. For my hallway, the width was more than 3 tiles wide by approx 2 inches. It would be less tile cutting and faster to lay three full tiles down and then cut a 2 inch strip along the wall, but it would not look balanced. So even though it takes more tiles and more tile cuts, I chose to balance the tiles evenly with two full tiles in the centre and then two more tiles evenly cut to fill in the sides.
When you plan your floor, take the time to place your tiles on the subfloor so you can better visualize how the finished product will look. Saving time and money may not always be your best choice.
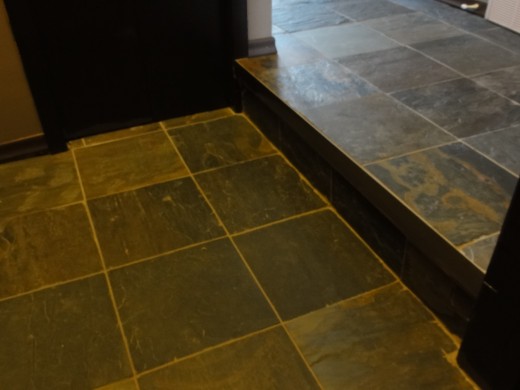
You will also need to purchase new finishing borders for where your tiles will meet other floors or even stairway landings. Again there is a variety of colors, materials and styles to choose from. It is best to take a sample of your tiles with you to a home renovation or flooring store and have someone match up the styles that will fit your needs. Since tiles come in different thicknesses, it is very important you purchase the right borders to match the thickness of your tiles.
Now that you have your layout planned, its time to cut some tiles. You can either lay down all the full tiles first and then do all the cutting later or you can make all of your cuts first. I chose to make all of my cuts first. This way I would not have to worry about the mortar drying before I place my tiles. For real slate stone tiles a wet saw is required. You can either rent a wet saw for $40 per day or you can just buy one for $140-$200. In my case I knew I would take on other stone tile projects so it made sense to purchase one.
The wet saws are easy to use, just fill the underlying tray with water, line up the stone tile with the guide bar, turn on the saw and slowly push the tile past the blade until the cut has been made. The guide bars are adjustable to whatever tile width you need. Always wear protective gear and follow the manufacturers safety notes.
Once you have cut enough tiles to last one batch of mortar, you are ready to start laying the tiles in place. Mix a batch of thinset cement mortar. I would normally only mix a quarter bag at a time, the same as with the subfloor. The mortar should have the consistency of peanut butter, easy to spread but not loose where it spreads like pancake batter.
Before you apply the mortar to the subfloor. draw a guideline down the length of the floor so you know where to place your first tiles. This is very important as most walls and hallways are not built perfectly square. If you lay the tiles down in a line following one of the walls and it turns out the wall does not run straight, your tiles will look crooked once in place.
Take your metal trowel and spread over the floor area enough mortar to cover at least 3 to 4 tiles at a time. Scrape over the mortar using the tooth edge of the trowel so that the mortar looks like a plowed farmers field. Then lay your tiles down one at a time. Wiggle the tiles into place.
The slate stone tiles can be a liitle fragile until they are cemented in place so do not tap them with a rubber mallet. Place spacers between the tiles to help keep the tiles alligned in a uniform pattern. Slate stone tiles can also vary in their thicknesses, so be sure to examine each one and select only the ones that are uniform enough to match your surface. I had several stone tiles that I could not use at all as they were either too thin or too thick.
Once you have all of your stones mortared in place, next step will be to grout in all of the spaces between the tiles.
More Stone Tile Projects
- How to Install a Stone Tile Shower Surround
How to turn your bath\shower into a beautiful stone tile shower surround. Here are all the DYI steps required to install a watertight stone tile shower surround. Stone tile will add warmth and value to your home, here's how.
Bringing Out the Color of Slate Stone Floor Tiles

How to Grout and Finish Your Slate Stone Floor
Your new slate stone floor is starting to look great, and now just the finishing touches need to be applied. If you haven't already done so, now is the time to remove all of the spacers between the tiles. Then you will need to use a grout scraper and clean out any excess mortar between the tiles. You want a clean groove between all tiles so there is room for the grout. Simply rub the rough edge of the grout scraper between the tiles. When all scraping has been completed, vacuum out all of the dust particles.
Next you will need to mix your grout. For stone tiles, especially the rough variety like slate stone tiles, you should purchase sand based grout. The grout comes in several colors so you can create the look you want. Depending, you may want a white grout so the tiles really stand out or a color that closely matches the tiles. The chose is yours and either will look great, it all depends on what you like.
You can purchase pre-mixed grout or the powdered type that requires water. The texture should be the same as the thinset cement. The grout is applied using a rubber applicator, looks simliar to the trowel but has a thick rubber surface. Simply spread and press the grout into all the grooves between all the tiles. I usually work with an area of about 6 tiles at a time. then using a dampened thick sponge, wipe off all excess grout off the stone tiles. Rinse the sponge often in a pail of warm water. Continue the above process of applying grout and washing off the excess until all grooves have been grouted.
Now you will want to bring out the color of your slate stone tile floor and also protect the tiles and grout surfaces. You can purchase a sealant liquid coating that can be rolled on with a sponge roller. Apply the first coat and let dry for 24 hours, then apply the second coat. After another 24 hours, take a clean sponge and rinse off all excess sealant. You may have to repeat this last step a few times. Congratulations, you have now completed your slate stone floor.


